Mount It to the Rack You Already Run
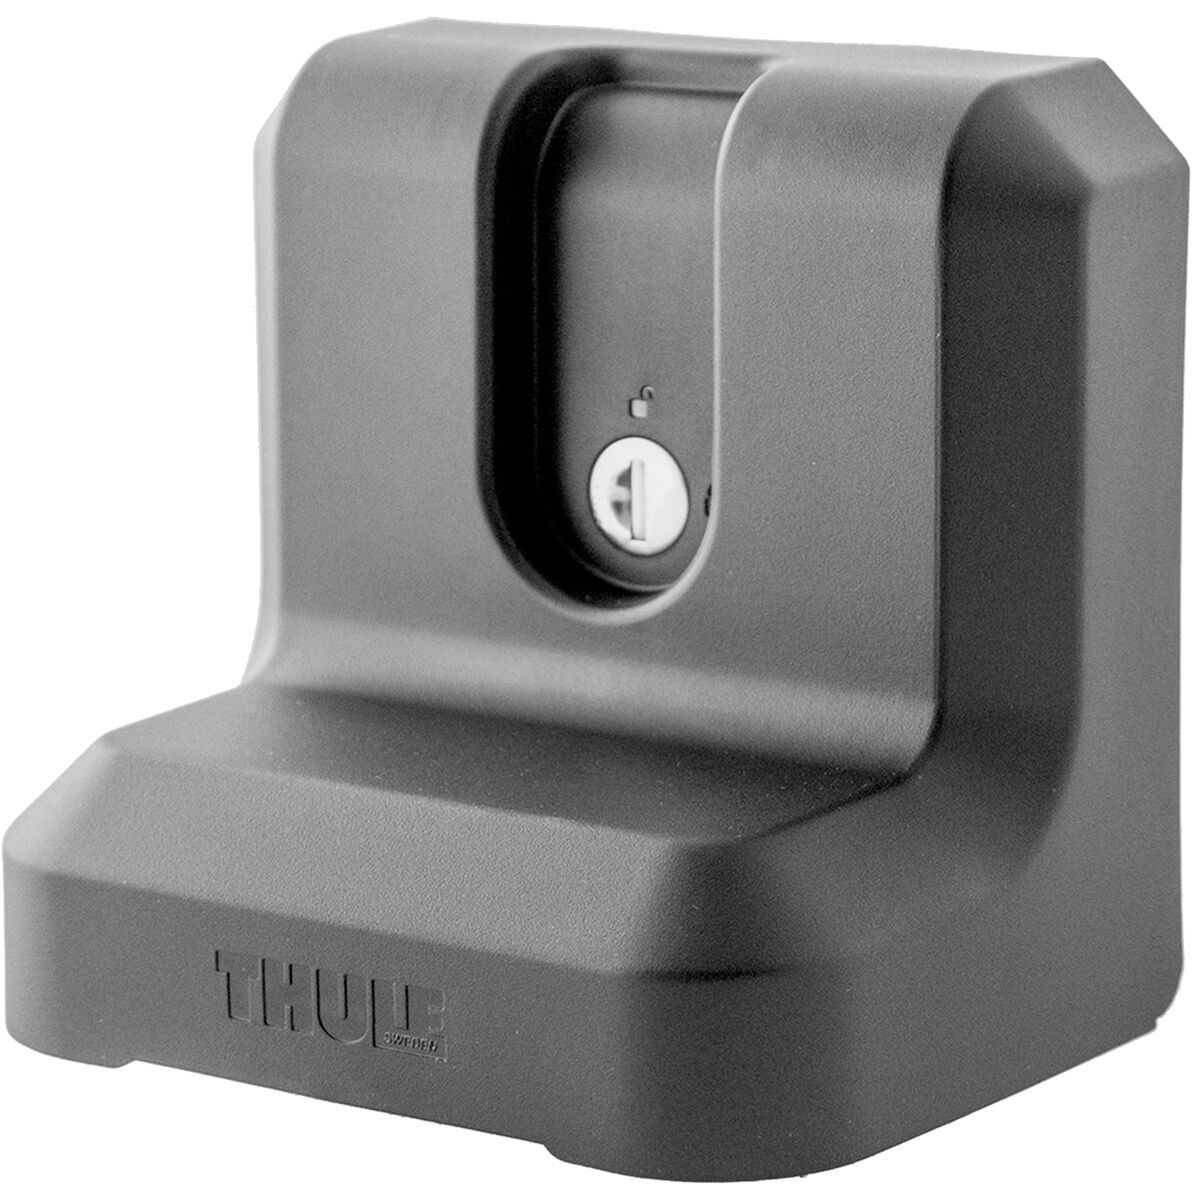
The secure way to install the awning is to use the Thule Awning Roof Rack Adapter and match the mount style to your rack: slide it into most T bars if your setup uses a track, or clamp it to aftermarket load bars up to 90mm wide if you run a bar-based system. That flexibility is the whole play here—it gives your awning a clean path onto different rack styles without forcing a full rack rethink.
For a T-track style setup, line the adapter up with the track in your crossbar and position it where the awning will sit evenly. For an around-the-bar style setup, place the adapter onto the load bar and confirm the bar width is within the 90mm limit. In both cases, the goal is the same: get the adapter seated correctly on the rack first, then attach the awning to the adapter so the connection is stable and centered.
Once mounted, the locking hood adds another layer of security by helping prevent potential theft. If you want the cleanest install path, this adapter is the bridge between your compatible Thule awning and the rack already on your vehicle—less guesswork, more shade when camp goes from sun-blasted to dialed.
Why This Adapter Earns Its Spot on the Rig
The beauty of the Thule Awning Roof Rack Adapter is simple: it opens up more mounting options for your awning. If your vehicle already runs aftermarket bars, you may not need to swap your whole rack setup just to add shade. This adapter is built to connect a compatible Thule awning to bars up to 90mm wide or into most T bars, which makes it a practical piece of hardware for mixed rack systems.
Built for Real Rack Variety
- T-bar fit: Works with track-style bars for a tidy, integrated connection.
- Load-bar fit: Attaches to aftermarket bars up to 90mm wide.
- Awning-ready design: Made to connect a compatible Thule awning to your roof rack setup.
That kind of compatibility matters when your vehicle is already set up for bikes, boards, or camp duty and you want to add coverage without overcomplicating the system.
Extra Security, Less Stress
The locking hood is a smart touch. It helps prevent potential theft, which is a nice thing to have when the awning lives on the vehicle between missions. It is the kind of detail that does not scream for attention, but absolutely earns it when you leave the trailhead, camp, or parking lot and want your setup to stay your setup.
Choose Your Mount Style Before You Start
The first call is not complicated: look at your roof rack and identify whether you are working with a T-track bar or an aftermarket load bar. If your crossbar has a track channel, this adapter may work with your setup. If your setup uses aftermarket load bars, confirm they are compatible and up to 90mm wide. That measurement is a helpful starting point for checking whether this adapter may fit your setup.
A Clean Install Starts With Compatibility
Before tightening anything down, confirm the adapter and awning are compatible with your rack setup. Position the adapter where the awning looks aligned on your rack before tightening it down. If you're using a track-style rack, check your rack and awning instructions before securing the adapter. For bar-style racks, confirm the adapter is compatible with your bar dimensions before installation.
When to Call in Backup
If your rack setup is a little custom, or you just want a second set of eyes before bolting everything down, a Gearhead® Expert can help you sort through fit questions. It is a fast way to make sure your awning, adapter, and rack are all speaking the same language before install day turns into garage-floor jazz.
Get the Right Fit, Then Get Outside
A good awning setup should feel solid, simple, and ready for long days outside—not like a puzzle with extra hardware left on the floor. That is why Backcountry keeps the focus on gear that solves the real setup question: how to mount cleanly to the rack you already run.
When fit gets a little nuanced, that is where talking to a Gearhead® Expert pays off. You get real guidance from someone who knows the hardware side of the equation and can help you think through T-track compatibility, bar width, and how to build a more secure awning setup around your vehicle.
Bottom line: less time second-guessing the mount, more time parked in the shade with camp dialed.
Why Buy the Thule Awning Roof Rack Adapter from Backcountry?
When you're dialing in a clean awning install, Backcountry keeps the buying experience just as simple with free 2-day shipping on orders $150+ for Summit Club+ members and a straightforward 90-day return policy that applies consistently across every brand it carries.
- Free 2-day shipping — on orders $150+ with Summit Club+, helping remove a key friction point when you need your setup parts fast
- 90-day returns — one return process for multi-brand orders, without having to chase separate brand policies
- Store credit beyond 90 days — returns are still accepted for store credit after the standard window
- Consistent regardless of brand — whether your order includes one brand or five, it is the same simple process